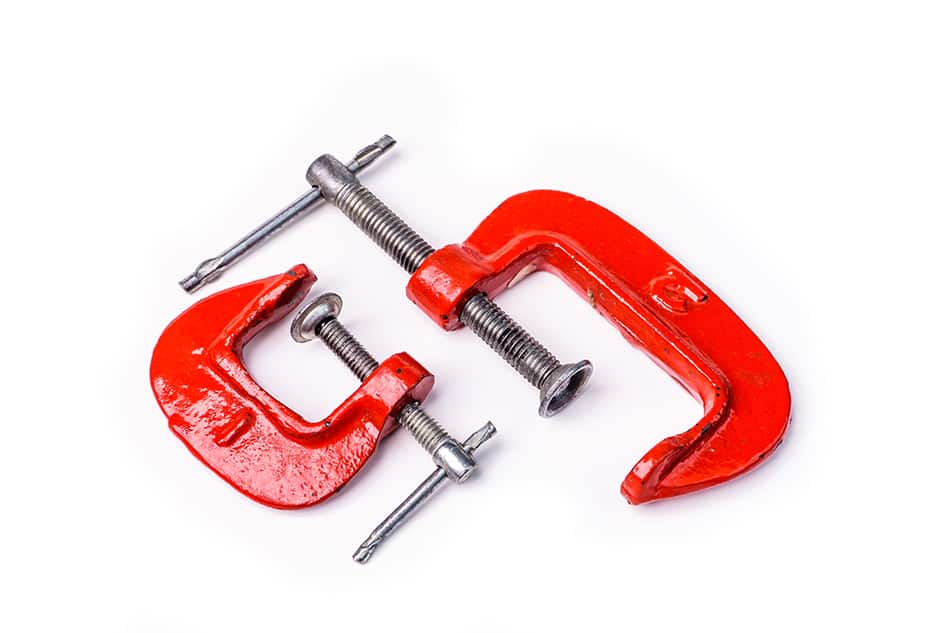
Clamps are useful tools that can secure one object to another to keep it in place. They are ideal for holding an item still while you work on it or for pressing a piece of work tightly together while the glue sets. There are various types of clamp available to suit different tasks, but for the most part, they all contain similar elements. Here we will discuss the parts of a clamp and what role each piece plays in the function of the clamp.
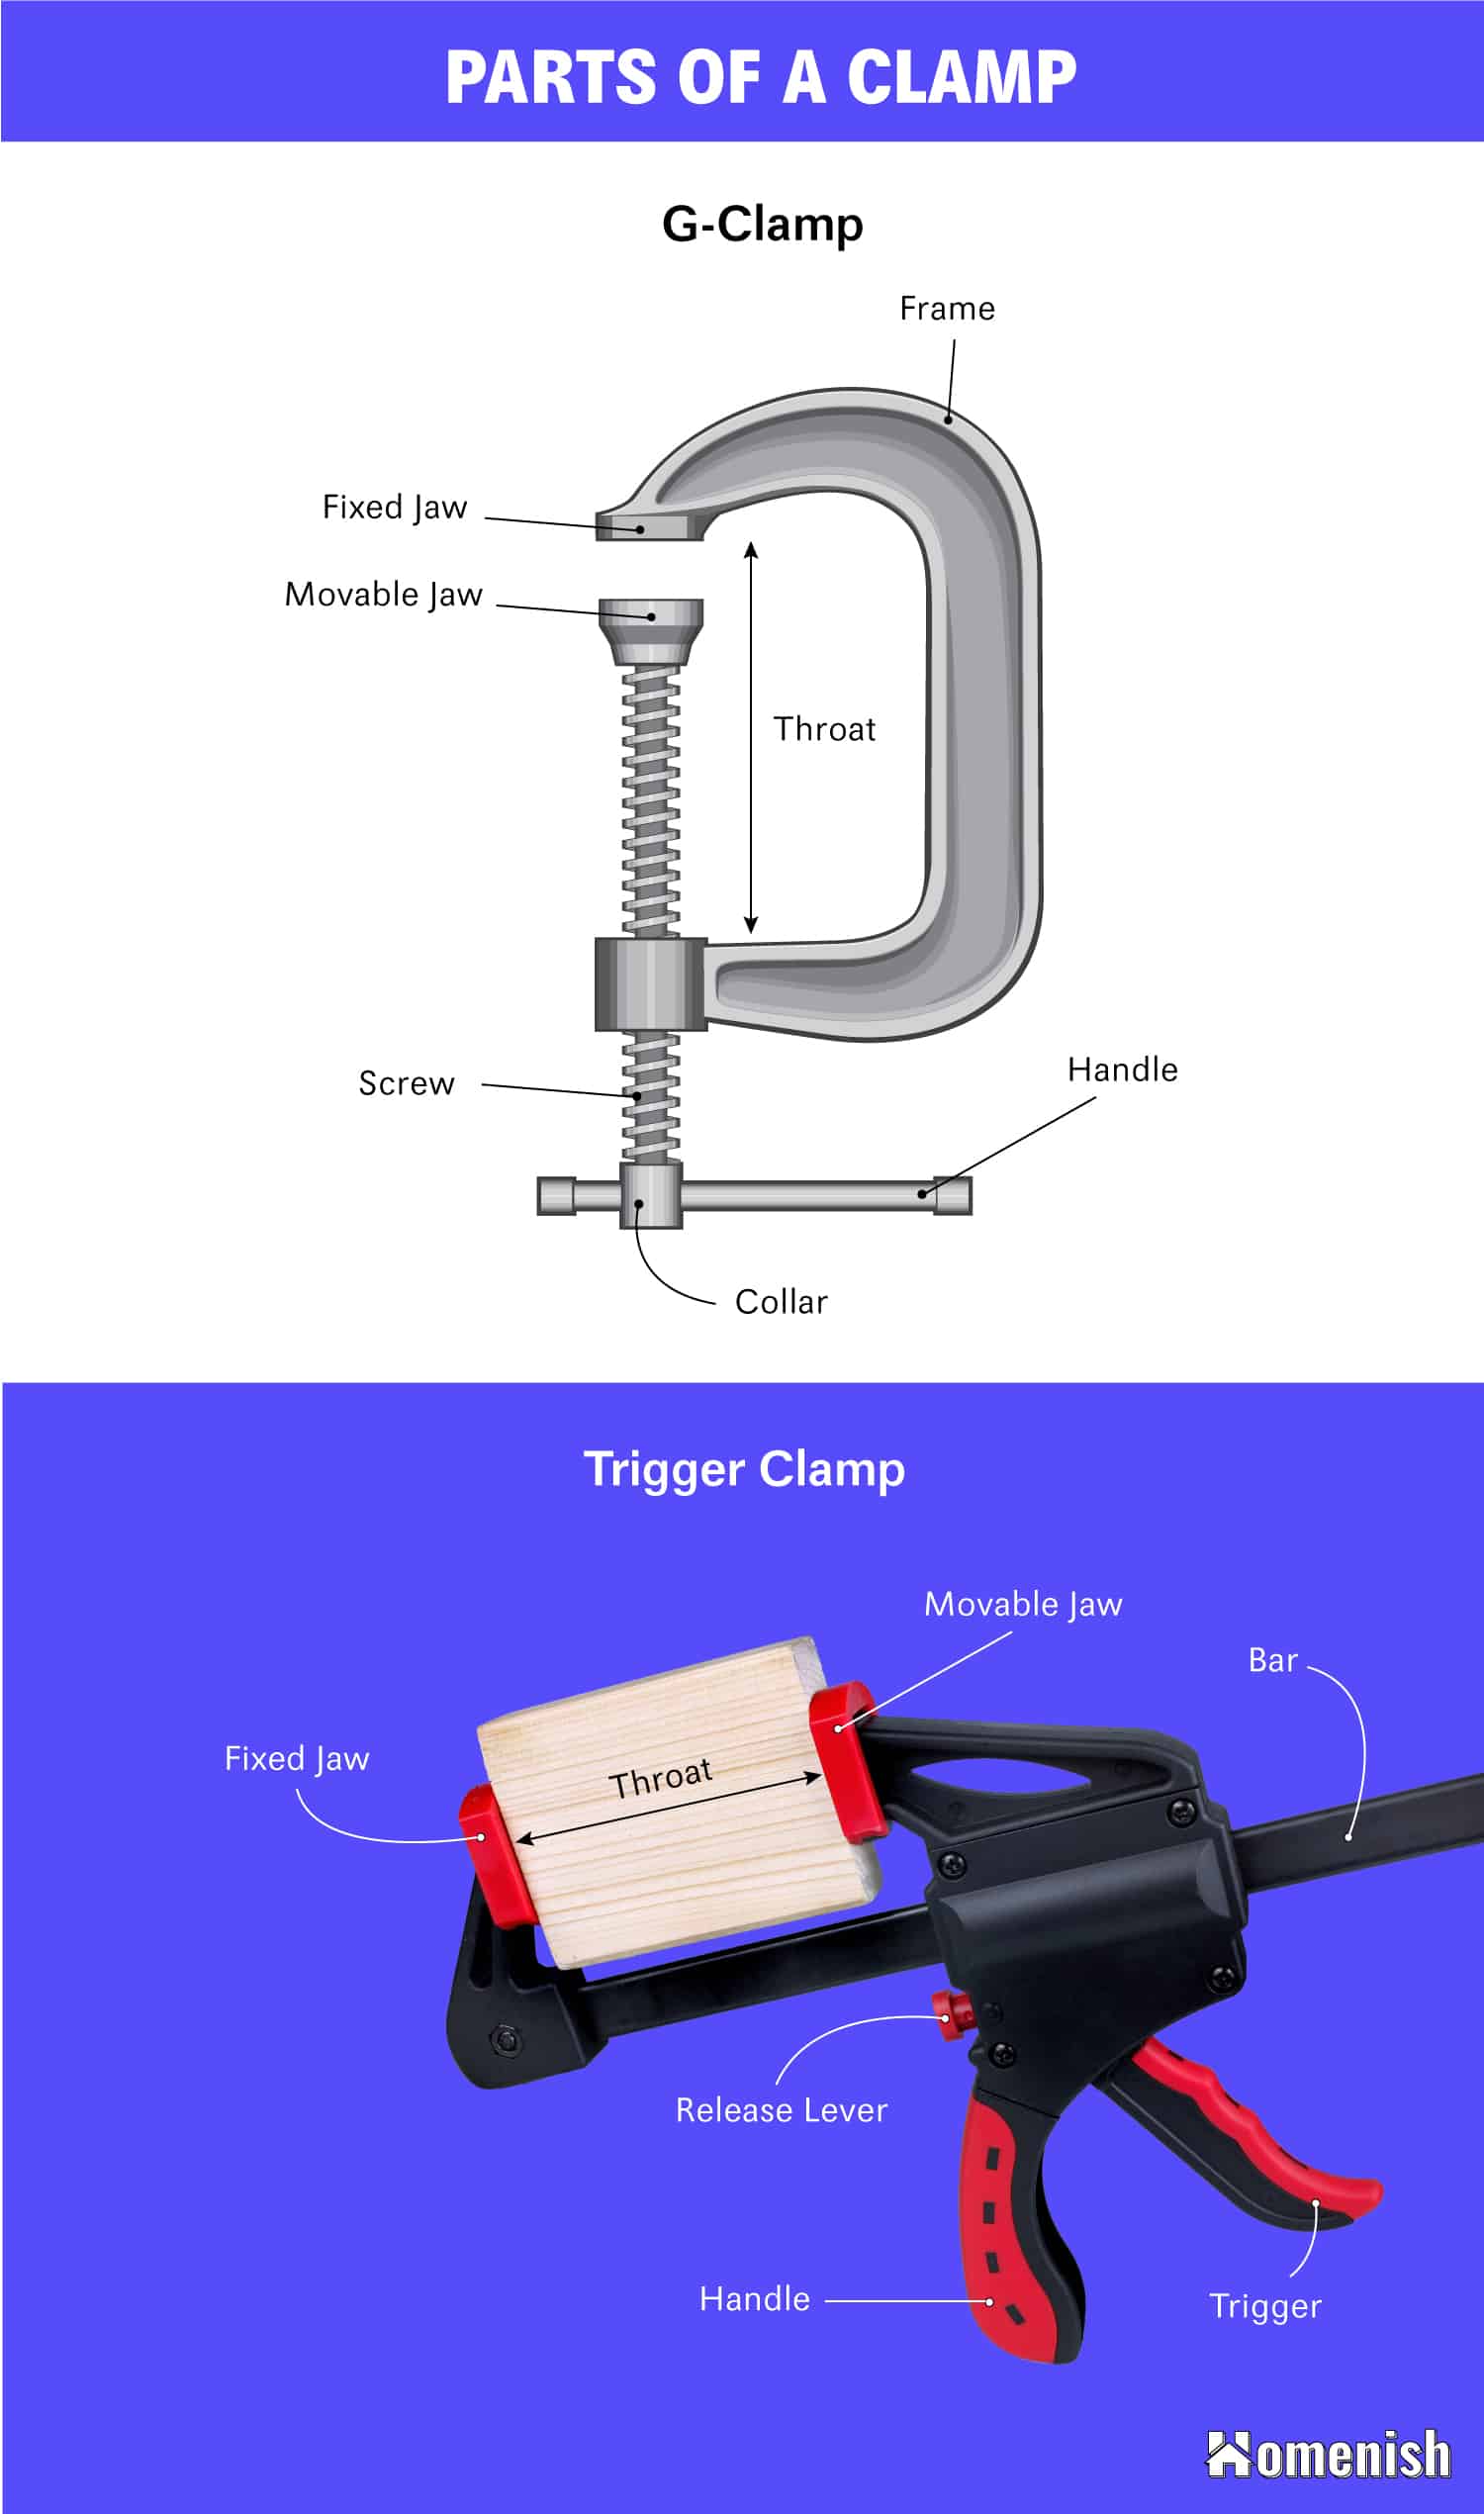
Find below our custom diagram for parts of two clamp types – G-Clamp & Trigger Clamp.
Frame
The frame of a clamp will typically be made from a strong metal such as steel or cast iron to ensure that it is not flexible and will not give under the pressure of the clamp, therefore reliably holding your item in place.
The frame will take a different shape depending on the type of clamp, but some of the most common and well-known clamps have a curved frame in the shape of a ‘G.’ These clamps are known as ‘G’ clamps but can also be referred to as ‘C’ clamps because the frame also resembles the shape of that letter.
The frame is the part of a clamp that holds the other elements together. At one end, the frame will have a fixed jaw, and at the other, it will be attached to a large screw or bar which will operate the movable bar.
The size of the frame will vary according to its intended use. For intricate carpentry repairs, you may need a clamp with a small frame, whereas when working on larger items, a clamp with a big frame will give you the ability to secure an oversized workpiece to a workbench. The frame of a good clamp will be chunky and robust to ensure that it is long-lasting.
Fixed Jaw
The fixed jaw of a clamp is the surface at one end of the frame, which will be pressed up against one of the items you want to secure. It is known as the fixed jaw because it cannot be adjusted. It is welded to the frame of the clamp and will be made from the same material. The fixed jaw can have a flat or ridged surface that will come into contact with the workbench or workpiece.
A slightly ridged fixed jaw will provide better grip and prevent the clamp from being able to move once fixed into place, but it can damage the item you are working on by creating indentations or scratches and should be avoided if you are working with wood or a shiny surface.
Flat fixed jaws may slide out of place if a lot of pressure is placed onto the item they are holding, but they are the best bet for ensuring your work doesn’t get damaged.
Movable Jaw
The movable jaw on a clamp is situated at the end of the adjusting screw or bar. It will usually incorporate a swivel head, which will be pressed up against an object to keep it in place. The movable jaw can be set at a customized position by operating the adjusting screw or bar. This enables the user to have one clamp, which will work in a variety of situations.
Adjusting Screw or Bar
The adjusting screw or bar is the part of the clamp which moves, and it is threaded through the end of the clamp’s frame, which is at the opposite end to the fixed jaw. It has the movable jaw fixed to the end of it and can be moved closer to the fixed jaw to lock smaller items into place or further from the fixed jaw to clamp larger items.
If the clamp has an adjusting screw, it will move in and out or up and down by twisting the screw. Some clamps will not have an adjustable screw and will instead have a bar. The bar will have multiple ridges all along it so that it can be fixed at various points to give a secure clamp on various-sized items. A bar will not be twisted or turned to be tightened or loosened like an adjustable screw and can instead be operated by a trigger.
Handle
The handle of a ‘G’ clamp will be at a right angle to the adjustable screw. It usually takes the shape of a metal rod that is slotted through the far end of the adjustable screw, which gives the user leverage to turn the adjustable screw, making it looser or tighter.
Trigger
Clamps that have a bar instead of an adjustable screw will usually have a trigger instead of a handle. When the trigger is squeezed by the hand of the user, the bar, and therefore the adjustable jaw, will move to a tighter position. When clamping an object with a trigger, you’ll want to keep squeezing the trigger until it cannot be pressed anymore to ensure the most firm and secure fit. To loosen a bar that is trigger-operated, the clamp will have a release button.
Release Lever
The release lever or release button on a clamp is pressed to loosen the adjustable bar and therefore unclamp your object. The release lever uses a spring-loaded system to operate and has the advantage of being able to unclamp much more efficiently compared to clamps with adjustable screws, which can take some time and effort to unscrew.
Throat
The throat of a clamp is the negative space found between the two ends of the frame. This is the area where your object and a workbench will go when you want to clamp them together.
The size of the throat dictates the size of items you will be able to use in your clamp, so a larger throat will be required for clamping larger objects. If you have a specific intention for your clamp, you’ll want to ensure you check the size of a clamp’s throat before purchasing to ensure it will be fit for purpose.
