Using a clothesline to dry your clothes is a slow, labor-intensive chore. Plus, in many suburban developments across the country, it is frowned upon by HOAs, zoning codes, and nosy neighbors alike. Because of this, America has passionately embraced clothes dryers, which are now cheaper than ever and come with a wide array of programming options and safety features.
A good example of this is Whirlpool’s Duet line. This sturdy front loader combines an intuitive “mode” dial, an LED screen, precise timers, and custom programs. Plus, Duet dryers look sleek and are remarkably energy efficient.
But despite all these fancy features, they are not infallible. What happens when they stop working? It turns out there is a lot of wiggle room between “nothing” and “buying a brand new one.” In this guide, we will go through some of the most common causes of why a Whirlpool Duet Dryer won’t start, how to diagnose them, and what to do about them.
Let’s start with the easy ones:
Cause #1: No power
Dryer machines are electric appliances, so they won’t work unless they are properly connected to electrical power. As obvious as it may seem if you ever find that your dryer won’t start, this is the first thing you should check.
How to diagnose this?
Always start with the simplest, most likely problem, as chances are this will also have the simplest solution. First, check that the dryer is plugged into the wall socket. If it is, you should then trace back the cable back into the appliance. Ensure it is not being pressed by anything and that there are no cuts on the plastic insulation that protects the cable.
If this looks OK, you should also trace your electricals back to your main supply. This means that if you are using a cord extension, you should scan your eyes along it to ensure it is properly plugged. Finally, try plugging something else into the same wall socket to ensure that the wall socket is working properly.
What to do if there’s no power?
That will depend on where the power is being cut. It may be that you just need to plug the appliance back into the socket or replace the cord extension. If your wall socket is the one amiss, then you may need to contact an electrician to fix your home’s electrical connections.
Cause #2: It’s a feature (of the settings)
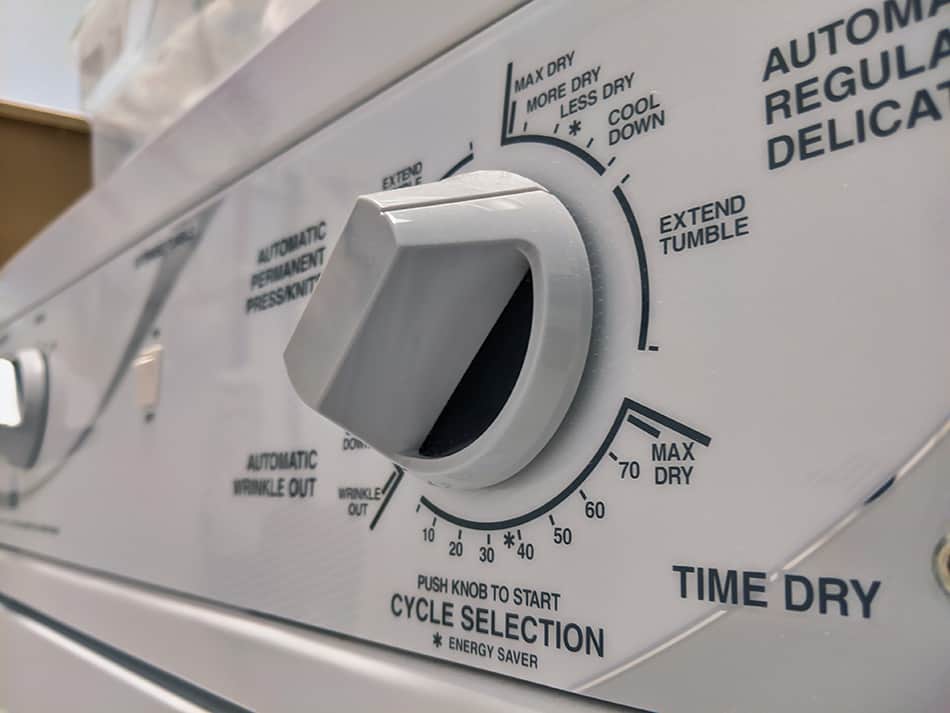
One of the Whirlpool DUET’s main features is that it allows you to switch between different cycles, tweaking time, temperature, and humidity levels. However, some of these settings may affect the way your dryer behaves as soon as you turn it on.
How to diagnose this?
Check the Settings switch, and ensure that it has not been placed under “Wrinkle reduction” mode. This cycle was created for very delicate, wrinkle-prone fabrics. To do this, it alternates between short periods of fast tumbling, followed by a few minutes in that hot air continues to come out, but the drum doesn’t rotate.
This may make it look like the dryer is not working.
What to do if you’re in the wrong setting?
It turns out the answer is not simply “change the settings.” You should not try to force the dial to change into a different cycle. This is because the Whirlpool Duet has a childproof safety feature, which prevents you from tweaking around with the controls mid-cycle.
Instead, you must find the “lock” button on the control panel. This is the one with a small padlock icon. Then, press it for at least three seconds. You will hear a small beep when the lock has been turned off. At this point, you will be able to change the settings.
Cause #3: Problems with your door
One of the most important safety features of any dryer is its door sensor. This prevents you from opening the door while the dryer is working, and it will keep it from starting a cycle if the door is not properly locked.
This will prevent you from ending up with a hot, steamy towel being thrown into your face. However, if the door switch malfunctions, it will prevent your dryer from working.
How to diagnose this?
Try to open the door and then close it again. The door switch should make a small “clicking” noise as soon as the door is properly latched.
If you cannot hear this noise, the door switch will be the culprit of your dryer malfunction. You can further confirm this by trying to wiggle the door gently after you’ve closed it. If you find that it is not latching properly or the door can go up or down a bit when it’s supposed to be closed, then you have a problem with the door witch.
What to do if your door switch isn’t working?
Before you call the technician or order a new door switch, check if anything is blocking the door. Sometimes, a piece of shoestring, a stray button, or even a lint ball may be blocking the door and preventing the door switch from engaging.
If there’s no visible culprit, try cleaning it anyway. If the door still doesn’t work, you must replace the door switch. If you don’t have any electrical or appliance maintenance background, you should probably call a technician for this.
Cause #4: Problems with the start switch
How did you notice that your dryer wasn’t working in the first place? This likely happened because you tried to flip the ON switch with your clothes already inside, and the dryer remained quiet and unbothered.
How to diagnose this?
This is an easy problem to spot but a difficult one to confirm. For the first hint at a problem with the start switch, you need a keen ear. Try to press the start button and listen closely to your dryer. You should hear a soft humming as the dryer attempts to start its components.
If you can’t heat a thing, this may mean that the dryer is not “receiving” the command for starting. In this case, the source of the problem is most likely the power switch. If you want to be sure, you will need to use a multimeter to test it.
A multimeter is a small handheld tool used to check for electrical continuity, which is whether an electrical current can go through a specific circuit or device. If the multimeter shows no continuity on the start switch, you will need to replace it.
What to do if you have a problem with your start switch?
The long and short of it is that you will need to replace it. Again, this is something best left to people with a background in electrical repairs.
Cause #5: Problems with the thermal fuse
So what happens if you have checked the start switch, and you do notice a small humming sound –, but the drum won’t move, and the vents create no heat? This means you are getting away from the land of easy solutions.
The thermal fuse is an important safeguard included within your dryer. It is usually located behind the drum, where it acts as a “cap” that ensures your dryer won’t overheat to a dangerous level.
How to diagnose a problem with the thermal fuse?
Sometimes, a problem with the thermal fuse won’t prevent your dryer from starting completely. However, you may notice that no heat is produced because the clothes are not drying. Alternatively, the dryer may be overheating. In this case, you may be able to notice the top or side panels are warm to the touch.
What to do if you have a problem with the thermal fuse?
To test the thermal fuse, you will need to remove the drum and use a multimeter. Then, you (or a qualified technician) will need to replace the thermal fuse.
Cause #6: Problems with motor
The motor of a tumble dryer is very delicate, as it depends on many moving parts. Because of this, it is also one of the hardest issues to fix at home.
How to diagnose problems with the motor?
A non-functional dryer motor has one big telltale sign: after pressing the ON button, the dryer’s LED panel will turn on, and you may even hear a slight humming. However, the drum will not spin.
What to do if you have problems with the motor?
This will depend on the type of damage you are dealing with: for example if the internal belt is broken or out of place, you can replace the belt without dealing with the entire motor.
Unfortunately, as the motor is fairly complex and has many moving parts, we would need an entirely separate article to explain all the possible issues. Get help!
Final Thoughts
Being left with damp clothes without any notice is bothersome, as you may need to improvise a clothesline for the next couple of days. However, this quick guide can help you diagnose the issue without waiting for a technician – and if you’re lucky enough to be dealing with a simple obstruction, you should be able to fix it too.
