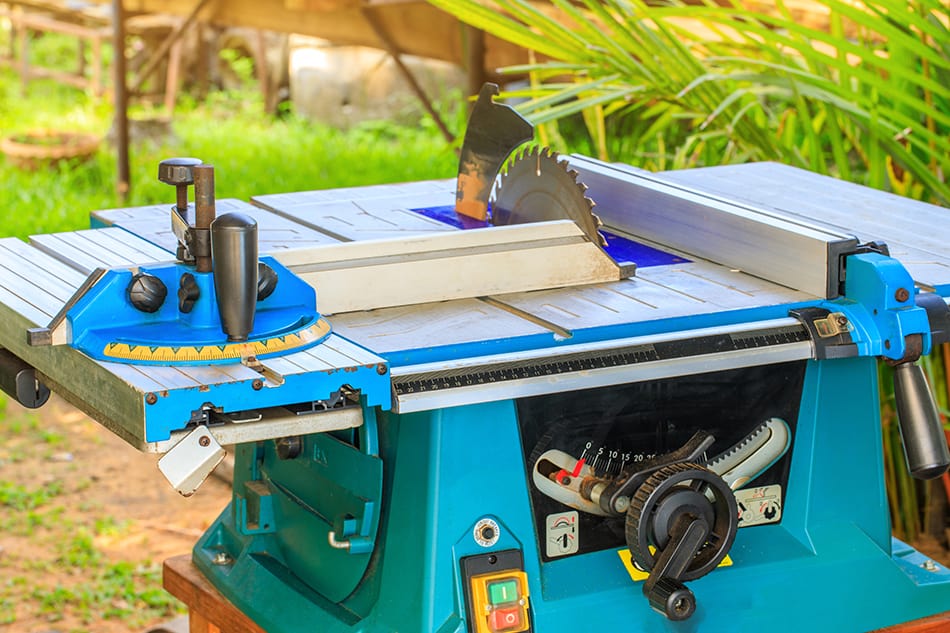
One of the most common power saws is the table saw. It is a fixture in many woodworkers’ shops. Although it is straightforward to use, it has different parts that can confuse most users. If you’re one of them, continue reading to learn more about the different parts of a table saw.
To make it easier to see the details, we put together a 3D diagram of a table saw below. You can refer to the below sections for further explanations of each part.
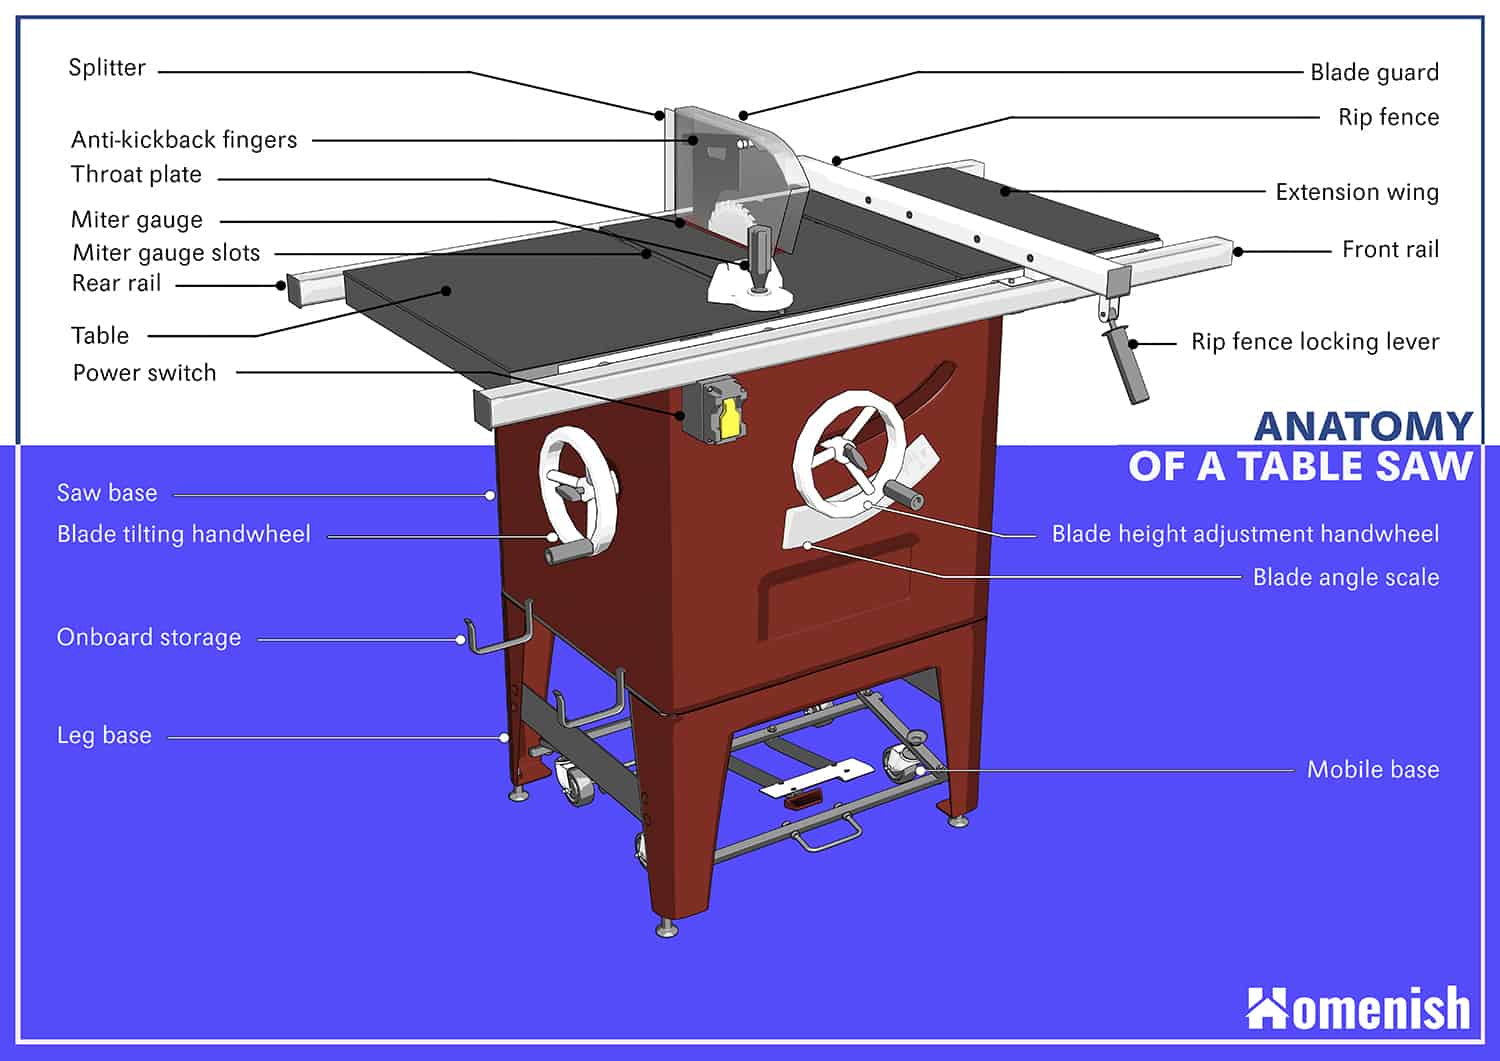
Table Top
This is the part of the power saw where the workpiece sits as it is fed into the blade. The tabletop is one of the more important parts of a table saw because its straightness has an effect on the precision of the cut.
The tabletop usually comes in sections. The center section is mounted directly to the base, surrounding the blade. It is usually made of cast iron and should be dead flat and smooth. The extension wings are found on either side of the center section.
As you may deduce, the on and off switch of the table saw is what you flip to operate the power saw. It is usually big for larger table saws and mounted on the lower part of the unit.
To activate it, you may simply nudge it with your knee. It also serves as a safety measure because you can quickly turn off the table saw in case your clothes get caught in the blade. Smaller benchtop models, meanwhile, feature a switch for this part.
Blade
To say that the blade is the most important part of the saw would be an understatement. It is, after all, that part of the table saw that cuts the workpiece. It is available in various types and sizes.
Suffice it to say you should have the right blade size for the table saw to prevent injury as well as damage to the power tool. Other considerations in choosing a blade for the table saw include the material, number, and geometry of the teeth of the blade. These factors can all affect the performance of the blade on the cutting task at hand.
Throat Plate
This is a removable piece of the table saw, allowing users to have access to the arbor and blade. A throat plate works well for general cutting. It usually has an overly wide slot, allowing the blade to be tipped to an angle.
This is often made of metal, although some entry-level models are made of plastic. The problem with those versions or models is durability, as the throat plate won’t hold up as well as those made from metal.
Arbor
This is a shaft in the table saw holding the blade. It also determines the blade size for the table saw.
The sizes of the arbor are usually adjustable, but for American stationary saws using a 10-inch blade, the arbor is ⅝ inch in diameter. Aside from ⅝ inch, the other common size for an arbor is 1-inch. Larger saws have arbors that are larger in diameter.
Elevation And Tilt Handles/Wheels
Both the elevation and tilt handles/tilts are designed to raise, lower, and tilt the blade. The latter action is important as this would enable you to make bevel cuts. However, the downside is that you can’t use zero-clearance throat plates. Large table saws have wheels, while smaller models have handles.
Blade Guard
This is a plastic or metal cover found on top of the blade. This is a safety feature of a table saw designed to protect the user during a cutting motion. However, it only protects you from being cut by the top of the blade. There are also blade guards with tool-less removal for convenient and easy changing of the blades.
Riving Knife
This is another safety feature of table saws. It keeps users safe by preventing the two faces of a workpiece from being pinched or bunched up. In short, the workpiece won’t kick back and injure you. It is mounted directly onto the arbor of the blade. It lowers and raises with the blade.
Dust Collection Port
Any type of feature designed to remove dust from the table saw during a cutting motion can be called dust collection. But generally speaking, a dust collection port or system is integrated with the blade guard.
It has a port located at the top of the blade guard, allowing users to attach a vac hose for sucking out dust. While it may sound like a convenient feature, the truth is that its efficacy is largely hinged on the vac power and flow rate.
Stand
A stand is commonly found in smaller table saws as well as benchtop table saws. This is a component for mounting onto the housing of the power tool. It lets users move the table saw around.
Moreover, it allows them to keep the table saw at the height most convenient for them. This is important not only for raising the height of the saw but also ensures that you can work on the tool in a natural position or posture.
Push Stick
This part of a table saw makes it safer to push the workpiece being cut. With it, you don’t have to push the workpiece using your hands. It should have a good grip so that it can push the workpiece without sliding over.
Miter Gauge
This is a protractor-shaped part of the table saw that helps in making accurate straight and angled cuts. It has a rail designed for sliding into one of the grooves of the table saw surface. It essentially sets the angle for miter cuts on the power tool. It comes with a fence where you can put the workpiece.
Rip Fence
This part of the table saw runs parallel to the blade. It guides the workpiece when making a rip cut. This not only protects you but also ensures that you can make an accurate cut. This can be adjustable to the left or to the right.
In conclusion, knowing and understanding the uses of parts of a table saw can help you effectively and safely use the power tools.
